Windows 10 clipboard history is a feature that allows users to see a list of items that they have copied over time. Users can also select a specific item to be pasted from the clipboard history list.
The clipboard history is a set of all data that you copied to the clipboard. This includes texts in various formats (plain text, rtf, html), images, file lists, etc.
In Windows 10, the clipboard history is disabled by default. But the new clipboard has many advantages if used properly. Here are some of the benefits you will get using the Windows 10 clipboard:
- You can copy multiple items and paste them anywhere you want.
- You can pin the item you use frequently. In this way, the item is kept in clipboard memory and can be used without copying the item again.
- You can synchronize the clipboard across multiple devices wherever you login with your Microsoft ID.
If you want to take your clipboard experience to the next level, you must make use of Windows 10 clipboard management.
Let’s begin by enabling the clipboard history feature in Windows 10.
See also: Windows 10 Power Toys
Table of contents
How to enable or disable Windows 10 clipboard history?
There are four ways to enable/disable clipboard history.
1. Enable or disable Clipboard history using Windows Settings
- Open Windows Settings by pressing Windows key + i
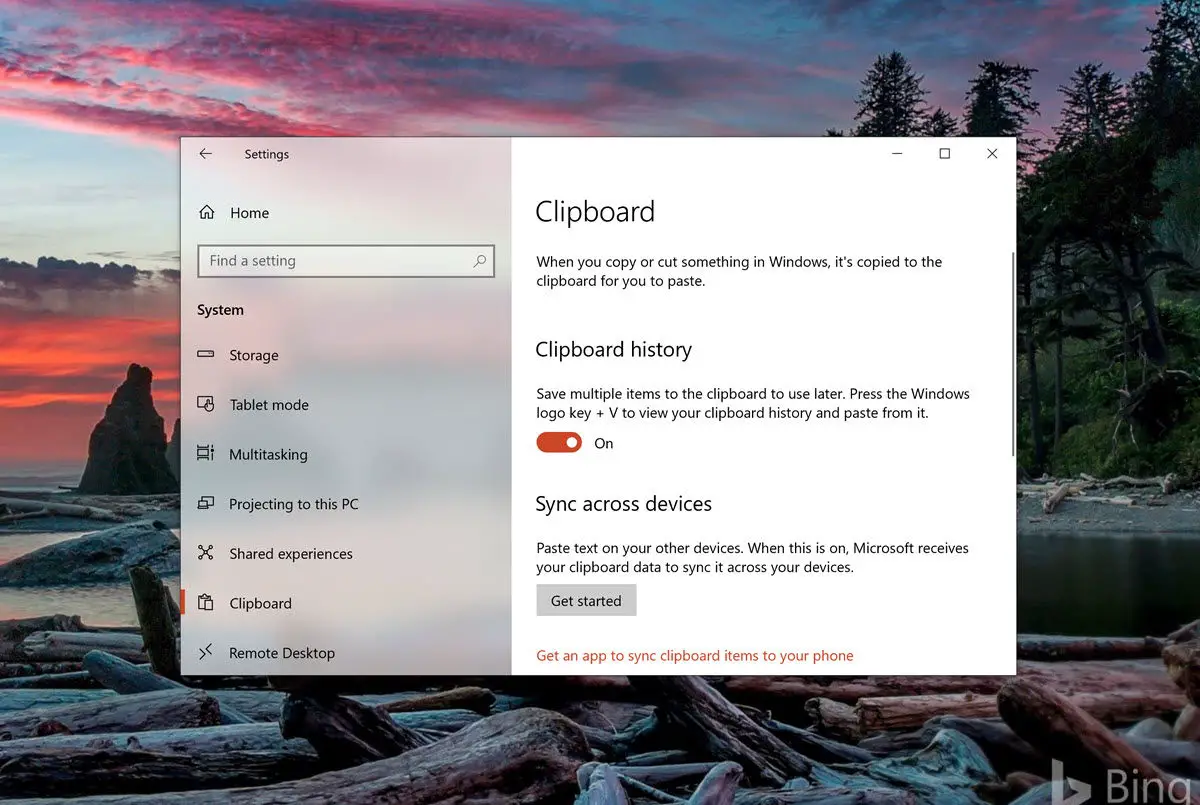
- Go to System –> Clipboard.
- Under Clipboard history, switch the toggle button to ON.

To verify that the clipboard history is enabled, press Windows key + V. This will bring up the list of items you copied in Windows clipboard memory.
Please note that clipboard memory is temporary. It will be erased when you restart the computer. The clipboard history is not maintained upon restart.
You can also disable clipboard history at any time. Just do the following:
- Go to Windows Settings –> System –> Clipboard
- Under Clipboard history, toggle the button to OFF.
2. Enable Clipboard history using Keyboard shortcut
If you want to quickly enable clipboard history, follow these steps:
- Simply press the Windows key + V.
- It will open the clipboard history prompt.
- Click on Turn on.
- Now the clipboard history is turned on, and anything you have copied can be viewed on the clipboard.

3- Enable or disable clipboard history using Windows Registry
If you are an advanced user, you can easily enable clipboard history using the Registry. Here are the steps:
- Open Registry Editor (Run –> regedit)
- Go to the following key:
HKEY_CURRENT_USER\Software\Microsoft\Clipboard - In the right-hand pane, right-click –> New –> DWORD Value. Name it EnableClipboardHistory.
- The following values will enable or disable the clipboard history:
- 1 = Enable clipboard history
- 2 = Disable clipboard history
Please note that you will need to restart the computer for the changes to take effect.
4- Enable or disable clipboard history using Group Policy
If you are a sysadmin or want to enable or disable clipboards for multiple users, the best way is to use the Group Policy settings.
- Open Group Policy Editor (Run –> gpedit.msc)
- Go to Computer Configuration –> Administrative Templates –> System –> OS Policies.
- From the right hand pane, double-click Allow clipboard history.
- Select Enable to enable clipboard history
- Select Disable to disable clipboard history

Please note that this will disable or enable clipboard history for all users in the system.
How to sync clipboard history?
You can sync your clipboard history across various devices.
Follow these steps to enable clipboard history sync:
- Go to Windows Settings –> System –> Clipboard
- Under Sync across devices, click on the Get Started button.
- Follow the instructions to enable synchronization options.

Please note that the sync option requires that you use Microsoft ID instead of your local account to sync all data across devices. All devices that have the same Microsoft ID signed in will share the same clipboard history.
How to clear clipboard history?
You can easily clear clipboard history. There are several ways to do it. However, I am providing a method using Windows Settings:
- Go to Windows Settings –> System –> Clipboard
- In the right-hand pane, under Clear clipboard data, press the Clear button.
This will delete your entire clipboard history.
How do I clear specific items from the clipboard?
- Open the clipboard history list using Windows key + V.
- Click on the three dots in the section of the data you wish to remove.
- Select Delete
- Now this particular thing will be removed from your clipboard history.

Conclusion
Clipboard can be a handy tool, especially when you wish to copy multiple things into a space or into different spaces.
Synchronization feature allows you to use the same copied data to use across different devices so you can paste data on different devices too.
How do you use the clipboard on your Windows 10 computer? Do you use it for copying multiple items or just a single item?